Bracelets

Bracelets
Back to categories
All bracelets
Ladies
Gentlemen
Baby bracelets
Mother Daughter
Father son
Children
boys
Engraved
With name
With letter
With Birthstone
With Birth Flower
With fingerprint
Slave bracelet
Friendship bracelet
Sisters
Necklaces
Necklaces
Back to categories
All necklaces
Ladies
Gentlemen
With letter
With name
Engraved
Mom
Children
Mother daughter
With birthstone
With fingerprint
With birth flower
Stainless Steel
With photo
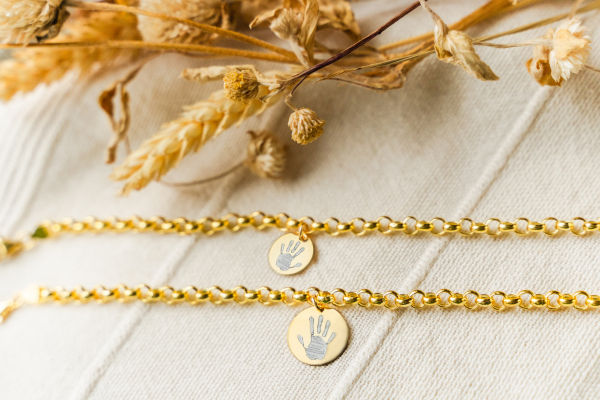
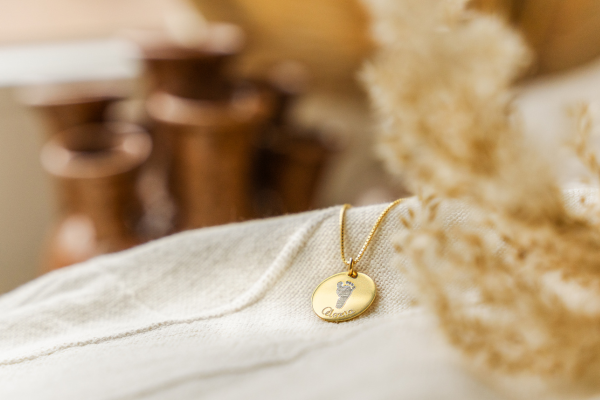
With hand and footprint
With Paw Print
Friendship Necklace
Charms
Charms
Back to categories
All charms
Silver
Letter charm
Charm bracelet child
Charm bracelet
Hearts
Engraved
With name
Rings
Rings
Back to categories
All rings
Ladies
Engraved
With birthstone
With fingerprint
Children
Stainless steel rings
With birthstone
Personalized
Silver
Hearts
Gold
Adjustable
Statement
Minimalist
Earrings
Earrings
Back to categories
All earrings
Ladies
Children
Birthstone earrings
Golden hoop earrings
Golden earrings
Large earrings
Heart earrings
Hoops
Clover earrings
Small earrings
Long earrings
Earrings
Earrings
Pearl earrings
Statement earrings
Stainless steel earrings
Studs
Set for 2 holes
Set for 3 holes
Silver hoop earrings
Silver earrings
Gift for >
Gift for >
Back to categories
Ladies
Gentlemen
Baby
Mom
Grandma
Child
Teen
Daddy
Grandpa
Sisters
Female friend
Girlfriends
Moments
Collections
Collections
Back to categories
Golden Moon
Fingerprint jewelry
Birthstone jewelry
Initial jewelry
Stainless steel jewelry
Mother daughter jewelry
Birth flower jewelry
Cufflinks
Medallion
Mom jewelry
Sets
Keychain with name
Clover jewelry
Animal jewelry
Hand and footprint jewelry
All Jewelry
Tips and advice
Tips and advice
Back to categories
How do you make a good paw print?
How do I choose the right size ring?
What is stainless steel jewelry?
Am I allergic to jewelry?
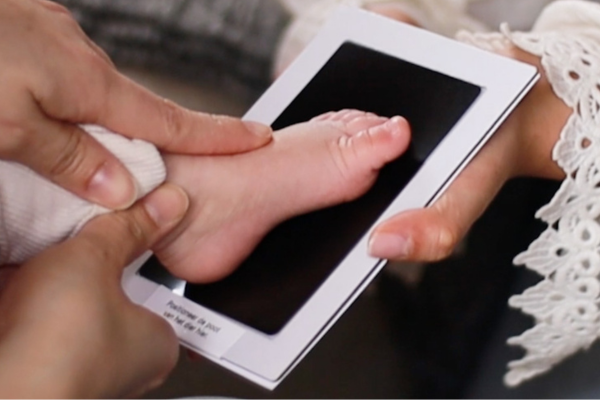
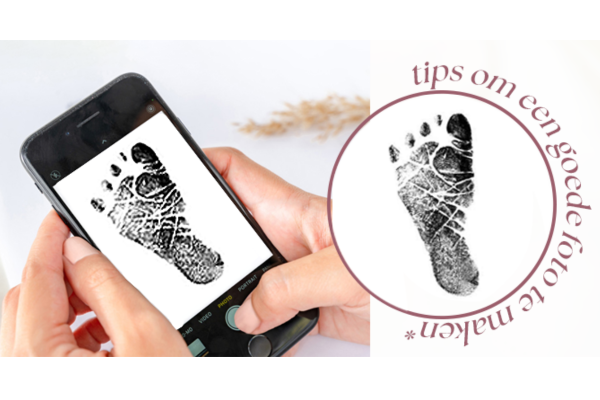
How to make a good footprint and handprint
How to put on a bracelet yourself?
How do I choose the right size bracelet?
Make a piece of jewelry with a child's drawing
How is my paw print jewelry made?
How do you make a good fingerprint?
How do you wear an anklet?
How can you take your jewelry on holiday?
How is my fingerprint jewelry made?
How do you clean silver jewelry?
What are gold plated jewelry?
Measure ring size
Maintain my KAYA Jewelry
From what age earrings?
Baby jewelry and safety
Tips for storing your jewelry
Can silver jewelry discolor?
How do you clean gold jewelry?
How does the closure of the men's bracelet work?
SALE
Customer service
BlogAbout us
 Nederlands